
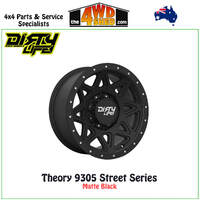
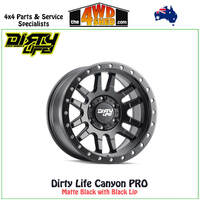
Roadkill Forged Race Beadlock

Dirty Life Roadkill Forged 9400 Race Series Beadlock
These are an order in item. Please contact us for stock availability. Pricing is for pick up from our Bayswater, Vic store. If you require freight, please contact us.
Making a tough wheel even tougher!
Engineered for the toughest terrains, the Dirty Life Roadkill Beadlock Machined Forged wheel is built to perform when it matters most. Precision-forged for superior strength and reduced weight, it delivers uncompromising durability without sacrificing style. Featuring a bold machined finish and an aggressive beadlock design, it’s made for serious off-roaders who demand both performance and presence.
FEATURES:
- Light weight 10 spoke design with V-shaped windows
- Forged beadlock ring (included) made of 6061 aircraft grade aluminium reduces weight while maximising grip where you need it most
- Increased rim wall thickness insures structural integrity under the most severe conditions
- 24 grade 8 yellow zinc plated bolts (silver by default)
- Stronger approx 3x than an equivalent cast alloy wheel
FULLY FORGED Light Weight Fully Forged 6061 Grade Alloy Wheel, Increasing Material Tensile Strength And Reducing Weight
Available Sizes:
- 17x9
Please Note: Spacer Ring may be required if fitting to thicker bead tyres. Spacer ring sold separately.
*Rims sold for offroad use only.
Check your state requirements before purchasing. You may be required to run flares to maintain legal wheel coverage.
The 4WD Shed can supply, fit, balance & align your new rims & tyres on your vehicle. Additional costs may apply. Please let us know your vehicle in the check-out notes, so we can make sure the right nuts are supplied where required.
DIRTY LIFE BEADLOCK WHEEL INSTALLATION INSTRUCTIONSBEADLOCK WHEELS ARE DESIGNED AND INTENDED FOR OFF-ROAD USE ONLY AND ARE NOT DOT APPROVED FOR STREET AND HIGHWAY USE. BEADLOCK WHEELS ARE NOT SUBJECT TO OUR STRUCTURAL OR FINISH WARRANTY DUE TO THE NATURE OF INTENDED USE OF THE PRODUCTS. PROFESSIONAL INSTALLATION FROM A QUALIFIED TIRE AND WHEEL INSTALLER IS REQUIRED AND IMPROPER INSTALLATION MAY CAUSE SIGNIFICANT DAMAGE OR HARM. THE WHEEL GROUP IS NOT RESPONSIBLE FOR DAMAGED CAUSED BY IMPROPER INSTALLATION, ASSEMBLY OR USE. DO NOT SUBSTITUTE ANY BEADLOCK RINGS OR HARDWARE PROVIDED WITH OUR WHEELS.
- 1.Install the valve supplied in to each wheel.Tighten the valve stem until the rubber gasket begins to bulge and be careful not to over-tighten the nut and washer assembly.
- 2.Lay the wheel on a solid,flat surface or tire mounting machine with wheel face up.
- 3.Apply a liberal amount of tire lubricate to the tire’s rear bead.
- 4.Place the tire on the face of the wheel, pressing firmly down while using a rocking motion. This will get the rear bead over the front flange of the wheel and positioned to the rear safety hump of the wheel.
- 5. Centre the tire and wheel ensuring the front tire bead properly aligns and seats with the front flange of the wheel.
- 6.Place the beadlock ring on the tire/wheel. Line up the holes then firmly press the beadlock ring against the tire.
- NOTE: A specialised beadlock spacer may be required on certain tires with thicker beads.7.Starting with the bolt hole at the 12 o’clock position, install A bolt and washer, making them hand tight only. Repeat this process at the 3 o'clock, 6 o'clock and 9 o'clock positions.8.Install the remaining hardware making sure you hand tighten only. Inspect the gap between the ring and wheel so that it remains uniform throughout this step. Once all hardware is installed, confirm that the tire is seated evenly all the way around the inner beadlock seat. If it is not, adjust the tire and/or wheel into the correct position.
- NOTE: DO NOT SKIP THE FOLLOWING STEPS! ADHERE TO THE RECOMMENDED TORQUE INSTRUCTIONS.
- 9.With all bolts installed hand tight,switch to a torque wrench and use diagonal pattern,torque each bolts to10-14 lb/ft.
- 10.Next, starting at the 12 o'clock bolt working in a diagonal pattern,torque each bolt to 18-24 lb/ft.Make a second pass ensuring the rings are properly seated at the final torque of 18-24 lb/ft.Note: there should be no gap between the wheel and ring(use a feeler gauge to verify proper fit).
- 11.You may now inflate the tire. Proper inflation will cause the rear bead to seat, or "Pop" into position. DO NOT EXCEED 40 PSI.
- 12.Check for leaks, using soapy water or a dunk tank before installing on vehicle.13.After first drive (no more than25 miles) Re-torque all bolts to 18-24 lb/ft.
(DIRTYLIFE-ROADKILL-FORGED)
| SKU | DIRTYLIFE-ROADKILL-FORGED |
| Brand | Dirty Life |
| Shipping Weight | 35.0000kg |


